Step 6
Remove any excess clay from around the top of the mould and use this to fill in any holes or gaps in the
clay.
Step 7
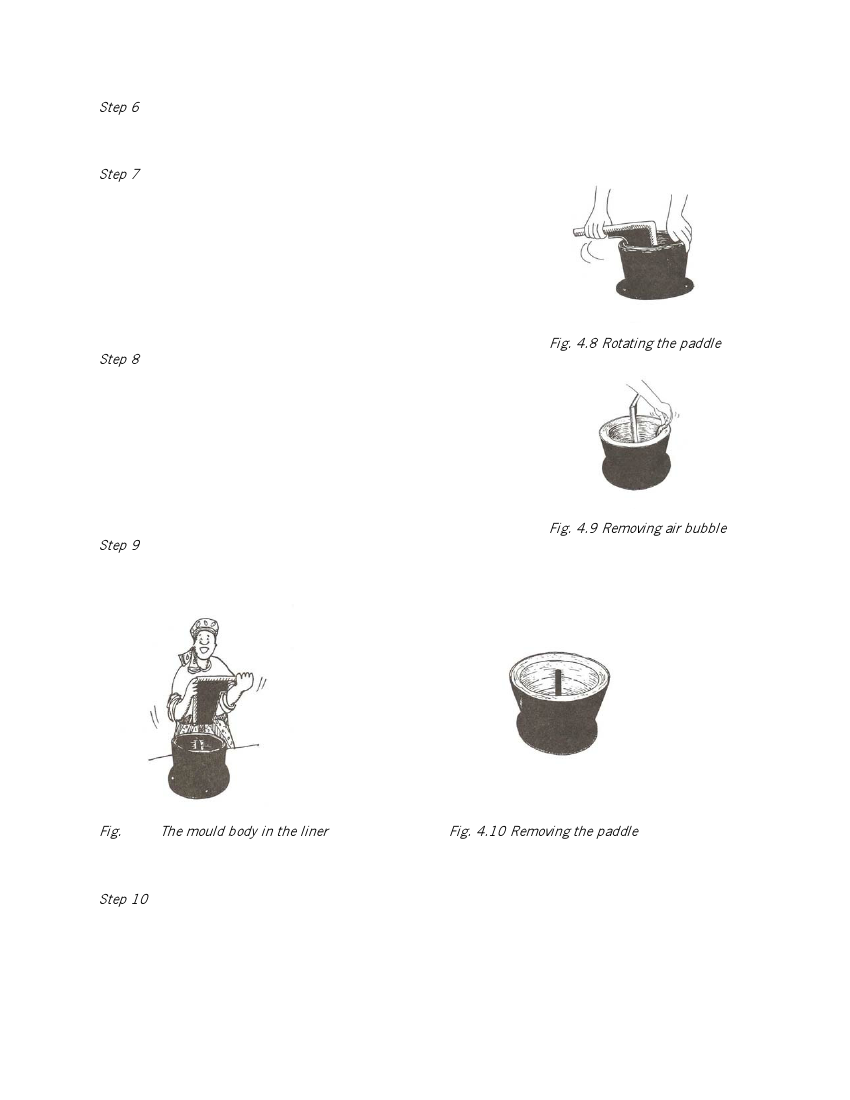
Attach the paddle to the central shaft, and lower it gently until it touches
the clay. Sprinkle a little water on the surface of the clay and rotate the
paddle slowly so that the blade squeezes the clay against the mould wall
and scrapes off any excess clay. Continue to rotate the blade, pushing it
down a little after each turn. Remove any build-up of clay on the paddle
with your other hand.
Fig. 4.8 Rotating the paddle
Step 8
When the paddle blade reaches the correct depth it will scrape the top
edge of the mould. Stop the paddle and fill any holes in the clay, sprinkle
with a little water, and rotate the blade faster to smooth the surface.
Watch for any air trapped in the clay; if the clay surface swells as the blade
approaches, then open up the air bubble and fill the area with more clay.
Fig. 4.9 Removing air bubbles
Step 9
To remove the paddle when you have finished moulding, sprinkle on a little more water and rotate the
paddle quickly for two to three turns. Holding the handle in one hand and the top of the paddle in the
other, lift the paddle out while it is turning so that it leaves no mark on the clay.
Fig. 4.11 The mould body in the liner
Fig. 4.10 Removing the paddle
Do not use too much water because this can cause the stove to crack during drying or firing.
Step 10
Lift the mould body off the mould base complete with the clay stove liner. Turn it upside down onto
cardboard or sacking in the storage place, tapping the mould gently on the floor to loosen the clay liner.
Alternatively, turn the liner out onto a wooden board, and carry it to the storage place.